Migrating a WordPress site might seem challenging, but it doesn’t have to be. Whether you’re changing hosting providers or moving to a new domain, learning how to migrate WordPress site can save you time and prevent disruptions. With the right tools and steps, you can ensure a smooth transition with minimal downtime.
This guide will walk you through the entire process, making it easy to migrate a WordPress site seamlessly. From using plugins to manual migration methods, we’ll cover all the essential steps to help you complete the move quickly and efficiently.
Choose New Hosting
You can skip this step if you have already purchased a new hosting. Here, we share some of the best hosting options along with any available offers. It will help you save time researching different hostings and get the best deal as well.
Hostinger
If you’re looking for fast and secure WordPress web hosting, Hostinger is an excellent choice. It provides reliable hosting with robust security and offers a 30-day money-back guarantee. Choose your perfect plan today to enjoy a secure and fast website experience. Click Here How to Secure WordPress with SSL and HTTPS.
GoDaddy
GoDaddy Hosting provides reliable and affordable solutions for websites of all sizes. With 24/7 customer support, fast performance, and easy-to-use tools, it makes website management hassle-free. Enjoy features like free domain registration and secure hosting to keep your site running smoothly.
Kinsta
Kinsta leverages Google Cloud Platform’s premium tier network and C2 machines to provide unique WordPress hosting performance. Its containerized architecture ensures high scalability, while built-in features like automatic daily backups, staging environments, and server-level caching optimize site management. With advanced security protocols, including DDoS detection and hardware firewalls, Kinsta provides a robust solution for developers and enterprises seeking reliable and fast hosting.
Namecheap
Namecheap offers reliable and affordable web hosting solutions with fast performance and strong security features. With plans ranging from shared hosting to VPS and dedicated servers, it caters to a variety of needs. Namecheap provides an easy-to-use control panel, a free website builder, and excellent customer support, ensuring a smooth hosting experience for both beginners and advanced users.
Siteground
SiteGround offers high-performance web hosting with a focus on speed, security, and excellent customer support. Powered by Google Cloud, it provides fast and reliable hosting with features like automatic daily backups, free CDN, and enhanced caching. With easy scalability, SiteGround is ideal for businesses and developers seeking a flexible and secure hosting solution.
Ways to Migrate WordPress Site:
There are 2 ways to go about it. One is using a plugin while the other is doing it manually.
1. Migration Through Plugins
One is using a plugin while the other is doing it manually. First, we will look into migration through a plugin, which is the easiest of the two as it involves just installing and activating the plugins and doing a few clicks to get the job done for you. Below is a list of plugins that help in the migration of your WordPress website smoothly.
a. Duplicator:
- Overview: Duplicator is a widely used migration plugin offering full site backups and seamless migration features. It allows you to package your WordPress site into a zip file, including the database, files, plugins, and themes.

- Features:
- Complete WordPress Backups
- Automatic Backup Schedule
- Cloud Backup Storage
- 1-Click Restore
- WordPress Migration Wizard
- Quick Website Transfer
- Server-to-Server Import
- Custom Search & Replace
- Multi-site Network Support
- Shared Database Support

- Pricing:
Free version available.
Pro Version: Starts at $49.50/year for 3 sites.
Pros:
- Easy setup with minimal technical expertise.
- Supports large websites in the Pro version.
- Cons:
- Limited functionality in the free version.
- May encounter issues with poorly configured servers.
- Comparison:
- Ideal for users who prefer straightforward migration without complex configuration.
b. UpdraftPlus
- Overview: Primarily a backup plugin, UpdraftPlus also supports site migration with its premium version.

- Features:
- Top-rated backup plugin.
- Multi-Site Support.
- Incremental backups.
- Schedule backups
- UpdraftVault Storage
- Remote Storage Options
- Secure backups
- Reporting, Monitoring, and Scheduling
- Restoring, Recovery, and Migrating
- WP-CLI support
- Pricing:
Free version available.
Premium Version: Starts at $70/year for 2 sites.

- Pros:
Reliable and beginner-friendly.
Comprehensive backup options. - Cons:
Migration tools are only available in the premium version.
The slight learning curve for beginners. - Comparison:
Best for users who need both backup and migration solutions.
c. All-in-One WP Migration
- Overview: Simplifies WordPress migrations with an intuitive interface and robust feature set.

- Features:
- Customizable Backup Options
- No limitations on the host or operating system
- Supports a vast range of hosting providers
- Full product support
- Browse WPRESS files
- Extract WPRESS files
- Mobile compatibility
- Available in over 50 language translations
- Pricing:
Free version available.
Premium Version: Starts at $69/year for unlimited sites.
- Pros:
No hosting or server restrictions.
Includes an import feature for backups larger than 512MB.

- Cons:
The free version has a file size limitation.
Advanced features require the premium version. - Comparison:
Excellent for users handling large websites with custom configurations.
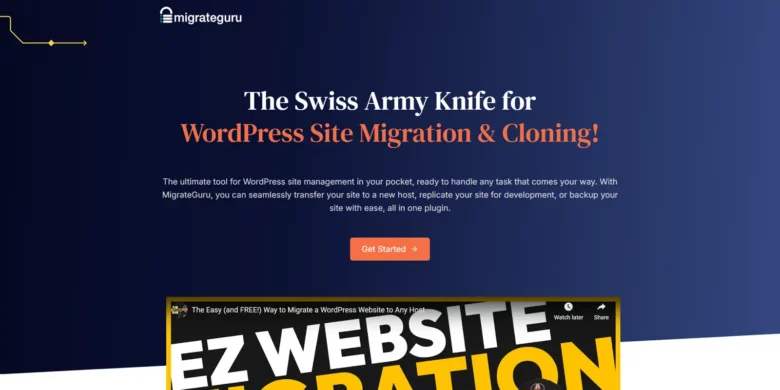
d. Migrate Guru
Overview: Specifically designed for quick and error-free migrations, especially for large sites.

- Features:
- True One-Click Migration
- No Overload On Site
- Built For Large Sites
- No Addons Needed
- No Storage Space Required
- Compatible With Every Web Host
- Fully Automatic, Built-In Search & Replace
- Timely Email Alerts
- Pricing: Completely free.

- Pros:
Cost-effective.
Handles large websites effortlessly. - Cons:
Limited control over the migration process. - Comparison:
Perfect for users looking for a free, reliable solution for large websites.
e. VaultPress (Jetpack Backup)
- Overview: A premium backup and migration tool by Automattic.

- Features:
- Real‑time cloud backups
- One-click restores.
- File Scanning
- Automated File Repair
- Spam Defense
Pricing:
Starts at $10/month.Pros:
High reliability and security.
Comprehensive backup management. - Cons:
Requires a Jetpack subscription. - Comparison:
Ideal for users prioritizing data security and automated features.
f. WPVivid Backup & Migration
Overview: A robust tool for backups, migrations, and staging.

- Features:
- Backup: Include/Exclude Rules
- Schedule (Incremental /General)
- Export/Import Site (Migration)
- Cloud Storage Support
- Auto-Backup Before Update/Rollback
- Flexible Backup Retention Rules
- Roles & Capabilities
- White Label
- Multi-Email Notification
- WordPress Multisite Support
- Pricing:
Free version available.
Pro Version: Starts at $49/year for 2 sites
- Cons:
Some advanced features are locked behind the Pro version.
- Comparison:
Great for users looking for an all-in-one solution.
2. Manual Migration Process: A Step-by-Step Guide
Migrating your WordPress site manually can be a cost-effective and reliable way to ensure full control over the process. While it requires some technical know-how, following the steps below will make the process straightforward. Click Here Identifying, Removing, and Preventing Malware on Your WordPress Site.
Step 1: Backup Your Website Files

- Why This Step Matters: Backing up ensures you have a complete copy of your website in case something goes wrong.
- How to Do It:
- Install an FTP client like FileZilla or use your web hosting’s File Manager.
- Connect to your website using FTP credentials.
- Navigate to the root directory (usually named public_html or similar).
- Download all files, including the wp-content folder, themes, and plugins.
- Compress the downloaded files into a zip archive for easier upload later.
- Include hidden files like .htaccess.
Step 2: Export the Database

- Why This Step Matters: The database contains essential information such as posts, pages, and user data.
- How to Do It:
- Log into your hosting control panel (e.g., cPanel) and open phpMyAdmin.
- Select your WordPress database from the left-hand menu.
- Go to the Export tab.
- Choose the Quick export method and format it as SQL.
- Click Go to download the database file.
Pro Tip: Compress the .sql file for safe storage.
Step 3: Set Up the New Server

- Access to the new hosting control panel.
- A fresh WordPress installation (optional for manual upload).
How to Prepare:
- Ensure the new server meets WordPress requirements (PHP version, MySQL/MariaDB).
- Create a new database for importing your old data.
Step 4: Upload Website Files to the New Server

Why This Step Matters: Transferring your files re-establishes the visual and functional aspects of your site.
How to Do It:
- Use the FTP client to connect to the new server.
- Navigate to the public_html directory (or the directory specified by your hosting provider).
- Upload the zip file containing your site files and extract it on the server.
Step 5: Import the Database

Why This Step Matters: Your WordPress site won’t function without the database.
- Open phpMyAdmin on the new server.
- Select the newly created database and go to the Import tab.
- Click Choose File and select your .sql file.
- Press Go to begin the import process.
If the file is too large, split it using tools like BigDump or contact your hosting support for assistance.
Step 6: Update wp-config.php

- Why This Step Matters: The wp-config.php file connects your WordPress installation to the database.
- How to Do It:
- Open the wp-config.php file in a text editor.
- Update the following lines with your new database credentials:
- php
- Copy code
- define(‘DB_NAME’, ‘new_database_name’); define(‘DB_USER’, ‘new_database_user’); define(‘DB_PASSWORD’, ‘new_database_password’); define(‘DB_HOST’, ‘localhost’); // Or your host’s database server address
- Save the changes and upload the updated file to the server.
Step 7: Update URLs in the Database

Option 1: Via phpMyAdmin:
- Go to the wp_options table in the database.
- Update the siteurl and home fields to reflect your new domain.
- Save changes.
Option 2: Using WP-CLI:
- Run the following command:
- bash
- Copy code
- wp search-replace ‘oldsite.com’ ‘newsite.com’ –allow-root
Option 3: With a Plugin:
- Install the Go Live Update URLs plugin.
- Enter the old and new URLs in Tools > Go Live.
- Click Update URLs.
Step 8: Update Permalinks

- Why This Step Matters: Ensures all links work on the new server.
- How to Do It:
- Log in to your WordPress dashboard.
- Navigate to Settings > Permalinks.
- Click Save Changes without altering the settings.
Click Here To Read: How to Hide or Remove the WordPress Upgrade Message in the Dashboard
Step 9: Point the Domain (If Necessary)

- Why This Step Matters: Redirects traffic to your new hosting provider.
- How to Do It:
- Update the DNS settings of your domain registrar to point to the new server’s nameservers.
- Wait for DNS propagation (can take up to 48 hours).
Step 10: Test the Website

- Why This Step Matters: Ensures everything is functioning as expected.
- What to Check:
- Links and navigation.
- Media files and images.
- Plugin functionality.
- Theme design and widgets.
Step 11: Clear Cache

- Why This Step Matters: Prevents old data from interfering with the new setup.
- How to Do It:
- Clear your browser cache.
- Purge cache in caching plugins or CDN services like Cloudflare.
Step 12: Secure the Site

- Why This Step Matters: Protects your site from vulnerabilities.
- What to Do:
Troubleshooting Tips for WordPress Migration
Even with a detailed plan, migration issues can arise. Below are some common problems and their solutions to help you address them efficiently.
1. File Upload Errors
Problem: Uploading large files (e.g., database or site files) fails due to server restrictions.
Solution:
- Split large files using tools like BigDump for databases or compress large site files further.
- Increase PHP limits by modifying the php.ini file or .htaccess:
- php
- Copy code
- php_value upload_max_filesize 128M php_value post_max_size 128M php_value max_execution_time 300 php_value max_input_time 300
2. Database Import Errors
- Problem: Errors like Unknown collation or SQL syntax error appear during import.
- Solution:
- Ensure the database version on the new server matches or exceeds that of the old server.
- Check for compatibility between the character sets (e.g., utf8mb4).
- Use a text editor to review the .sql file for compatibility issues.
3. Internal Server Errors (500 Errors)
- Problem: Accessing the site results in a blank page or a 500 Internal Server Error.
- Solution:
# BEGIN WordPress
<IfModule mod_rewrite.c>
RewriteEngine On
RewriteBase /
RewriteRule ^index\.php$ – [L]
RewriteCond %{REQUEST_FILENAME} !-f
RewriteCond %{REQUEST_FILENAME} !-d
RewriteRule . /index.php [L]
</IfModule>
# END WordPress
- Increase PHP memory limits in the wp-config.php file:
define(‘WP_MEMORY_LIMIT’, ‘128M’);
4. Incorrect URLs
- Problem: Images and other media are not loading on the new site.
- Solution:
- Use DNS testing tools like whatsmydns.net to check propagation status.
- Temporarily use your new server’s IP in your computer’s hosts file for testing:
- plaintext
- Copy code
- 192.0.2.1 www.yourdomain.com
Best Practices for Smooth Migration
1. Plan Ahead
- Schedule the migration during low-traffic hours to minimize downtime.
- Inform users of possible interruptions with a maintenance mode plugin.
2. Create Multiple Backups
- Use both manual and plugin-based backups for redundancy.
- Store backups in multiple locations (e.g., local drive and cloud storage).
3. Test the Migration
- Set up a staging site to verify the migration before going live.
- Test functionality, links, and forms thoroughly.
4. Optimize the Database
- Clean up the database by removing unused tables and revisions before migration using plugins like WP-Optimize.
5. Monitor Performance Post-Migration
- Use tools like Google PageSpeed Insights or GTmetrix to compare site speed before and after migration.
- Address performance bottlenecks caused by hosting or resource configurations.
Plugins vs. Manual Migration: Which Should You Choose?
| Aspect | Plugins | Manual Migration |
| Ease of Use | Ideal for beginners; minimal setup. | Requires technical expertise. |
| Control | Limited control over the process. | Complete control over every step. |
| Time Efficiency | Faster for small to medium websites. | Time-intensive but flexible. |
| Customization | Restricted by plugin capabilities. | Fully customizable. |
| Cost | Free to affordable premium versions. | Free, but may incur labor costs. |
| Scalability | Struggles with large or complex sites. | Handles all site sizes with proper setup. |
Recommendation:
- Use Plugins for small to medium sites or if you lack technical skills.
- Opt for Manual Migration if your site is large, highly customized, or if you need granular control.
Conclusion
Migrating a WordPress site doesn’t have to be overwhelming. With plugins like Duplicator or All-in-One WP Migration, the process can be simplified, while manual migration provides unparalleled control for those with technical expertise. Following best practices and troubleshooting common issues ensures a smooth transition, preserving your site’s integrity and performance.
FAQs
1. Can I migrate my WordPress site for free?
Yes, free plugins like Migrate Guru and the manual migration method are cost-free options.
2. How long does a WordPress migration take?
It depends on your site’s size and the migration method. Plugin-based migrations can take as little as 30 minutes, while manual processes may take several hours.
3. Do I need to deactivate plugins before migration?
It’s a good practice to deactivate caching and security plugins to prevent conflicts during migration.
4. What should I do if migration fails?
Restore your backup, identify the issue (e.g., incorrect database credentials, missing files), and retry the process.
5. Can hosting providers assist with migration?
Many hosting providers offer free migration services for new customers. Check with your provider to see if this option is available.


